With the release of the new Cortana Skills Kit, with Bot Framework integration, we are now able to create skills which are backed by bots! This is a really exciting prospect as now we can potentially have a bot that can serve both text based channels, as well as other speech enabled channels like Cortana.
Even if you are familiar with the Bot Framework, there is quite a lot of new pieces to consider when creating a bot on the Cortana channel. However, in this post I am going to go through how you can create a basic Cortana Skill using a Bot Framework bot and test it, by talking with your skill, in Cortana.
Setup your developer environment
First things first. Right now the Cortana Skills Kit is only available to use for the US (United States) language and region and so before you do anything you will need to set your environment’s language and region settings to US English. You will also need to alter the region on your Android / iOS device if you plan to use the Cortana app to test your skill, which is what I will be doing as part of this post.
Register your bot and create your skill in the Cortana Developer Dashboard
Now, before we start building out Cortana enabled bot, we need to create our Cortana Skill from the developer dashboard. You can do this by either creating your skill in the Cortana Developer Dashboard at https://developer.microsoft.com/en-us/cortana/dashboard where you can then be redirected to the Bot Framework dashboard to register a bot. Or, alternatively, you can register your bot in the Bot Framework dashboard first and then enable the Cortana channel – which incidentally is what you will want to do if you want to enable Cortana for an existing bot.
For this example, I have registered a bot in the Bot Framework portal first. My demo bot is called ‘HR bot’ and can help the user book meetings and let their employer know if they won’t make it into work. I won’t go over how to register a bot in this post, but if you need a refresher or this whole Bot Framework game is new to you then head over to some of my earlier posts where you can find out about getting started and some of the basics.
Once you have registered your bot in the Bot Framework portal, you should notice that Cortana is now an available channel (along with the new Skype 4 Business and Bing channels – but that’s for another post!).

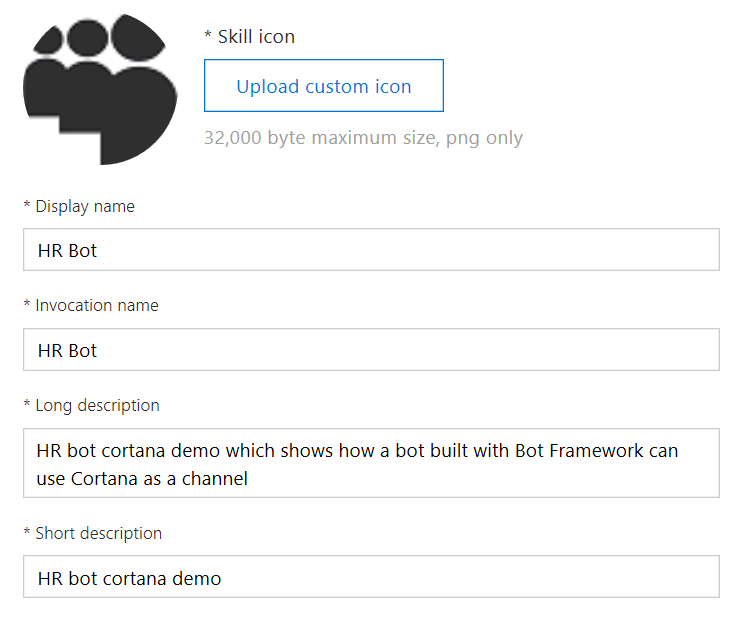
Selecting the new channel will open a new window and take you to the Cortana Skills Dashboard in order for you to setup your new skill that will be connected to your bot. Here we need to provide a few pieces of information, with the most important two being;
- Display name – the name shown in the Cortana canvas when a user users your skill
- Invocation name – This is really important because this is the name used for a user to talk to your skill. e.g. “Hey Cortana, ask HR Bot to book a meeting for me”. It is really important to pick an invocation name that is easy for a user to say and equally easy for Cortana to understand. I will be posting another blog at some point soon with some best practice information.

There are additional options available to you on this page, such as the ability to surface user profile information through your skill to your bot and I will explore these in future posts, but for now just enter the basic information and save your changes. Once you have done this, you should now see Cortana is registered as a channel for your bot!

Teach your bot to speak!
Now that we have registered our bot and enabled the Cortana channel, its time to build the bot itself with the Cortana channel in mind.
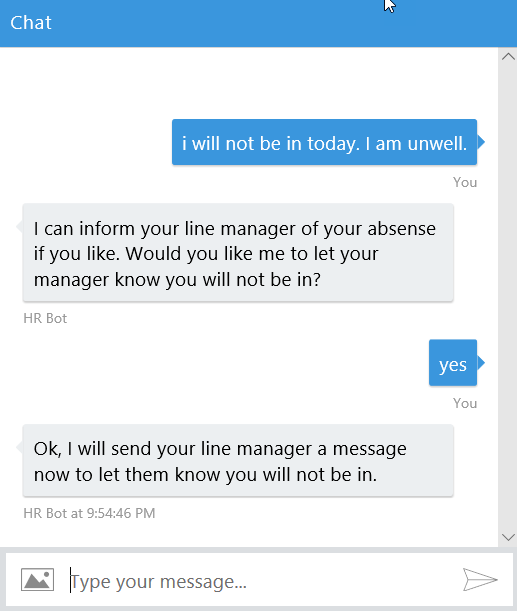
For my example, I have something that will be very familiar to anyone who has been developing with the Bot Framework to date, a bot that is integrated with the LUIS Cognitive Service. One of the intents I have wired up is ReportAbsense, where a text based conversation in a channel like web chat might look similar to the one shown below.

Up until now, to achieve the above conversation we would use the PostAsync method on our conversation context object to send messages to the user, supplying the text that we want to post into the channel. The code for the conversation above would look something like the below.
|
1 2 3 4 5 6 7 8 9 10 11 12 13 14 15 16 17 18 19 20 21 22 23 24 |
[LuisIntent("ReportAbsence")] public async Task ReportAbsence(IDialogContext context, LuisResult result) { var promptOptions = new PromptOptions<string>( "I can inform your line manager of your absense if you like. Would you like me to let your manager know you will not be in?", "If you like, I can let your manager know that you will not be in. Would oyu like me to? You can say either Yes or No"); PromptDialog.Confirm(context, this.AfterConfirmAbsenceAsync, promptOptions); } private async Task AfterConfirmAbsenceAsync(IDialogContext context, IAwaitable<bool> result) { var r = await result; if (r) { await context.PostAsync("Ok, I will send your line manager a message now to let them know you will not be in."); } else { await context.PostAsync(string.Format("Ok, **don't forget that you need to let them know within 2 hours.**", r), "Ok, don't forget to let them know in the next 2 hours"); } context.Wait(MessageReceived); } |
With the latest release of the Bot Framework SDK, a new method is now available to us which we can use when we are dealing with speech enabled channels – context.SayAsync.
Using the SayAsync extension method, we can specify both the text that we would like to display in text based channels, but also the speech that should be output in speech enabled channels like Cortana. In fact, Cortana will show both the text on the screen (providing the Cortana device has a screen – like a PC / phone) and also say the speech you define. The built in prompt dialogs now also support speech enabled channels, with additional properties speak and retrySpeak. This means we can tailor our messages depending on the method of communication and also ensure our bot can support both speech and non-speech enabled channels.
After updating the above code to use the new SayAsync method and updating our prompt to include the options for speak / retrySpeak, it now looks like the below.
|
1 2 3 4 5 6 7 8 9 10 11 12 13 14 15 16 17 18 19 20 21 22 23 24 25 26 27 28 29 30 |
[LuisIntent("ReportAbsence")] public async Task ReportAbsence(IDialogContext context, LuisResult result) { var promptOptions = new PromptOptions<string>( prompt: "I can inform your line manager of your absense if you like. Would you like me to let your manager know you will not be in?", retry: "If you like, I can let your manager know that you will not be in. Would oyu like me to? You can say either Yes or No", speak: "Would you like me to inform your manager?", retrySpeak: "Should I tell your manager? You can say yes or no"); PromptDialog.Confirm(context, this.AfterConfirmAbsenceAsync, promptOptions); } private async Task AfterConfirmAbsenceAsync(IDialogContext context, IAwaitable<bool> result) { var r = await result; if (r) { await context.SayAsync( text:"Ok, I will send your line manager a message now to let them know you will not be in.", speak: "No problem, I will send them a message now"); } else { await context.SayAsync(string.Format("Ok, **don't forget that you need to let them know within 2 hours.**", r), "Ok, don't forget to let them know in the next 2 hours"); } context.Wait(MessageReceived); } |
You can now use these methods to build a bot, or update an existing bot. Then you can deploy it and ensure that the bot’s endpoint is updated in the Bot Framework dashboard as you would with any other bot. Once you have done this you are almost ready to test your bot on Cortana.
Before moving on to testing our bot though, there are a few things worth pointing out;
- The SayAsync method also allow you to set options including an InputHint (ExpectingInput / AcceptingInput / IgnoringInput) which tells the Cortana channel if you are expecting input and if the microphone should be activated following your message being posted or not. e.g. you might send multiple separate messages all at once, with each setting their InputHint to IgnoringInput, apart from the last. This helps ensure that no input is accepted until all messages have been sent.
- You can specify the message to be spoken directly on an activity object as well as using the SayAsync extension method.
I plan to go into more detail about all of the various aspects of building bots for Cortana in future posts, with this post simply designed to be an introduction.
Enable debugging and testing our new skill
Now for the really exciting bit, testing our new Cortana enabled bot!
First we first need to enable debugging within the Cortana dashboard. This will make your skills available on Cortana devices where you are signed in with the same Microsoft Account under which you have registered the skills. It will also enable additional debug experiences, such as the ability to see additional information sent between your bot and the device.

Now that we have enabled debugging, we can use a Cortana enabled device, such as a Windows 10 PC or an Android / iOS device.
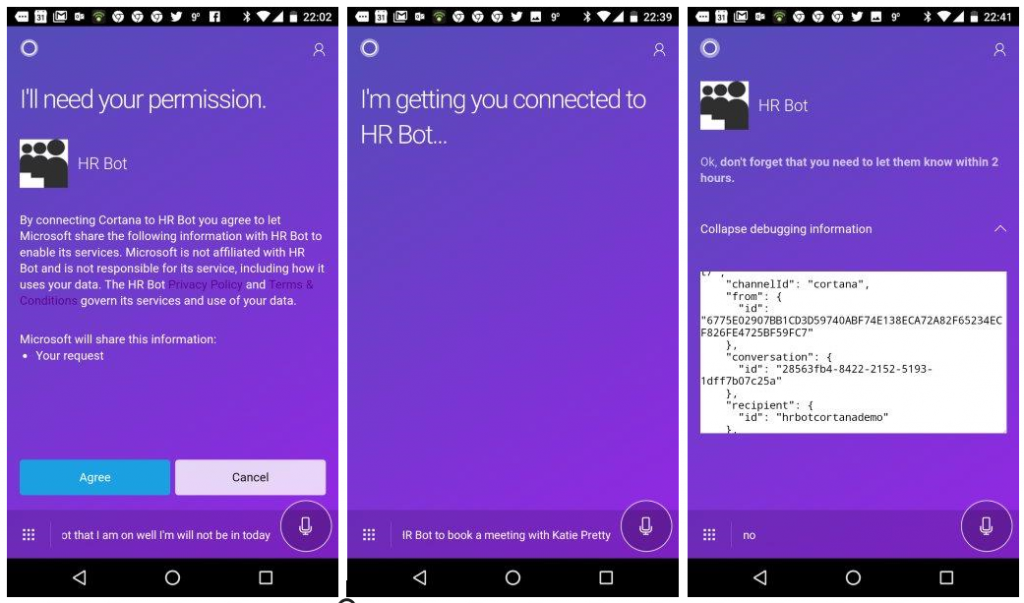
For my example, I launched the Cortana app on my Android phone and said “Hey Cortana, tell HR Bot that I am not well and will not be in the office today“. At this point Cortana correctly identified my skill, connected with my bot and, because it was the first time I had used the skill, presented me with a permission dialog where I can agree to continue using the skill.
Once I have accepted I can continue to converse with my skill with my voice, just as I would with my keyboard in another channel.

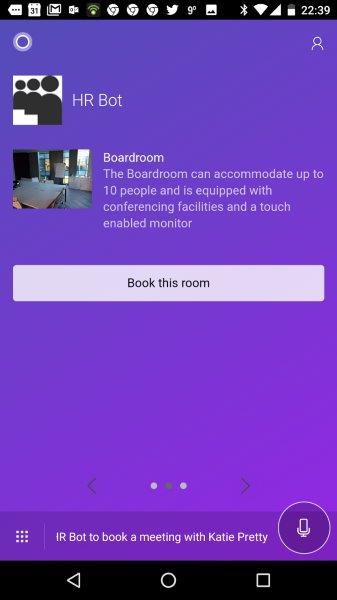
As mentioned earlier, you can see that Cortana is displaying accompanying text messages on the canvas as well as outputting speech and we can also continue to use other elements that we already utilise on other channels today, such as cards, to display other appropriate information.

Hopefully this post has helped you get up and running with a Cortana Skill backed by the Bot Framework. Watch out for future posts soon about other Cortana Skill features!